Debian Linux
In this section, you will learn how to install and configure an Axon.ivy Engine on a Debian based linux machine.
Install the Engine
There is a convenient DEB package available to install the Axon.ivy Engine. You can download and install it with the following bash script:
cd /tmp
wget https://developer.axonivy.com/permalink/8.0/axonivy-engine.deb -O axonivy-engine.deb
sudo dpkg -i axonivy-engine.deb
rm -f /tmp/axonivy-engine.deb
Note
The most important folders of the Axon.ivy Engine are:
/usr/lib/axonivy-engine-8/is the root installation folder with symlinks to all locations which are relevant to the engine./etc/axonivy-engine-8/folder which contains the configuration files./var/lib/axonivy-engine-8/deployfolder which is used to deploy Axon.ivy projects.
Examine the Engine
After the installation the engine will automatically be started as systemd
service. You can check the operative state with systemctl status
axonivy-engine-8. The output of the service status will expose an URI where
the Axon.ivy Engine page is accessible.
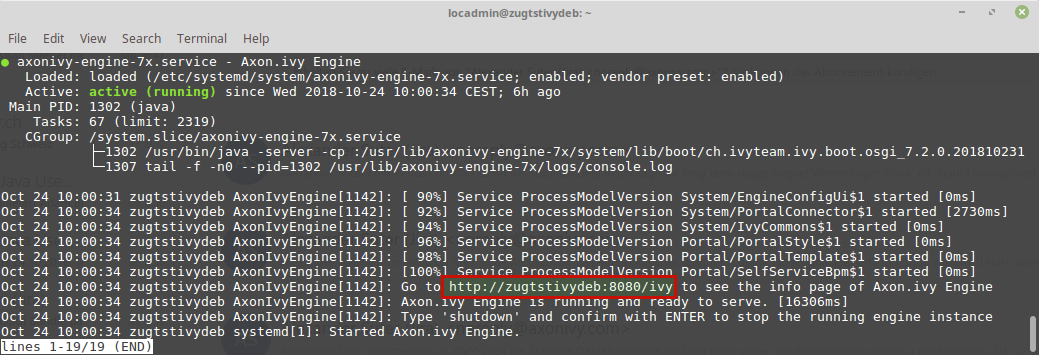
Copy this URL. On your client machine open a web browser and navigate to that URL. This will display the Axon.ivy Engine main page.
Use the Engine
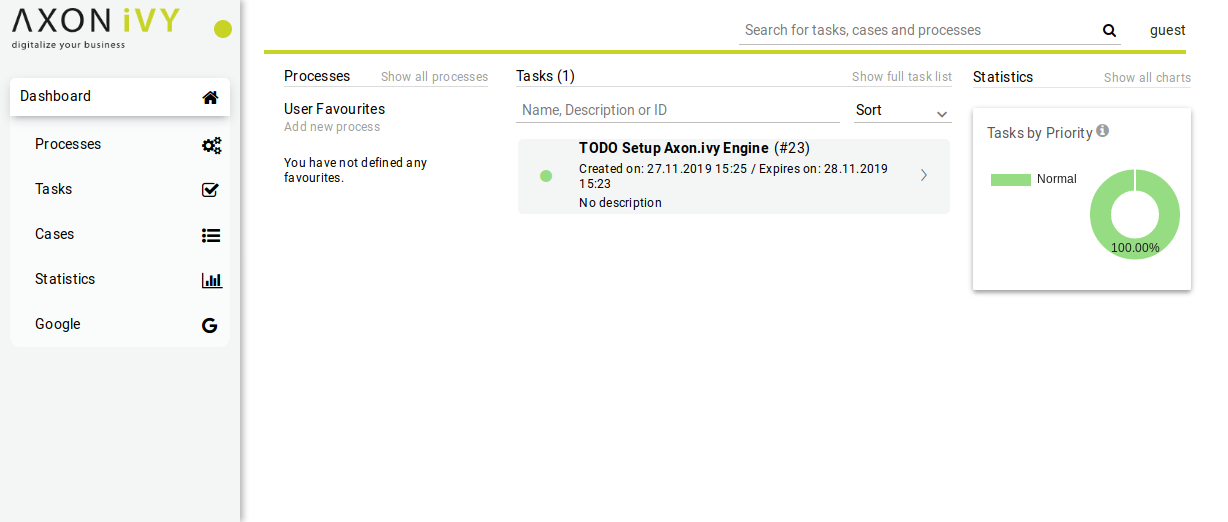
The main page of the Axon.ivy Engine looks like this
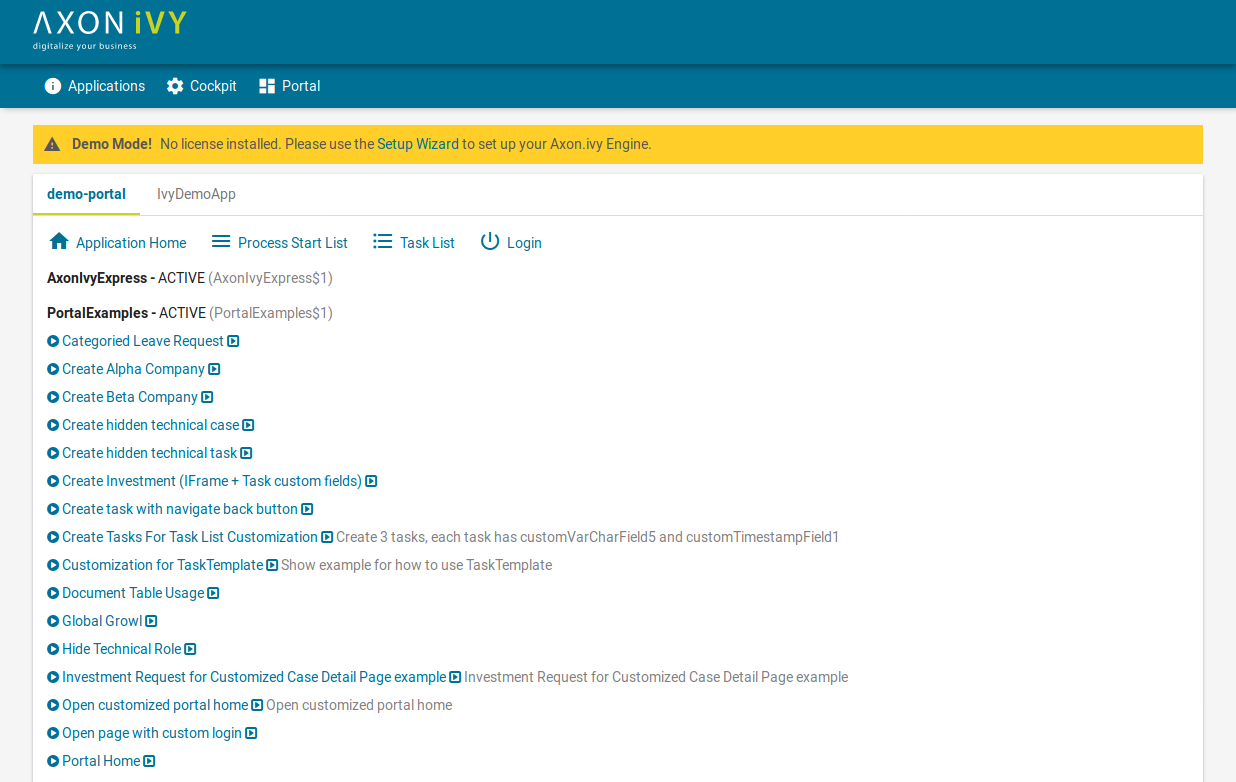
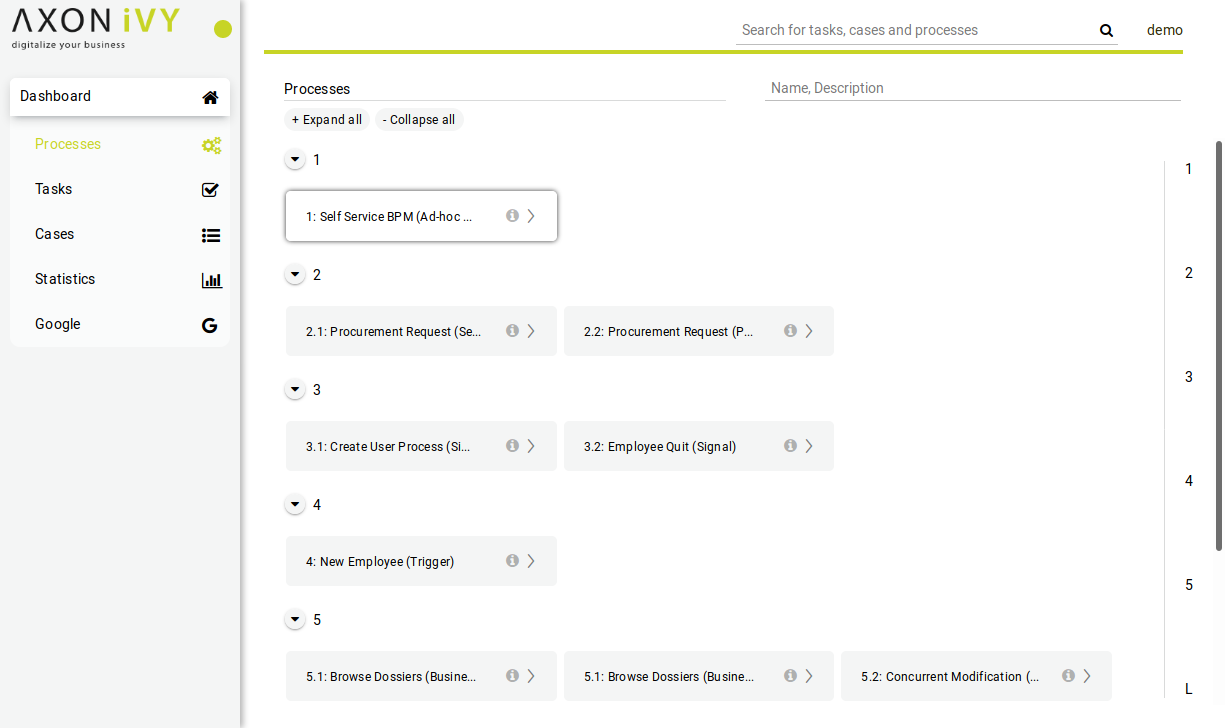
The Axon.ivy Engine is running in Demo Mode. This is because you did not install a valid license yet nor did you configure a system database. Note, that everything that you do with the Axon.ivy Engine running in Demo Mode is lost when you shut down the engine. However, you can use the engine also in Demo Mode and tryout the pre-installed Portal application by clicking on the Portal Home link. To login use one of the predefined demo users: demo, guest or admin. The passwords of the demo users are equal to the user names (E.g. demo for the demo user). Login as demo user and try to create a TODO task for the guest user using the Axon.ivy Selfservice process:
Configure the TODO task as follows:
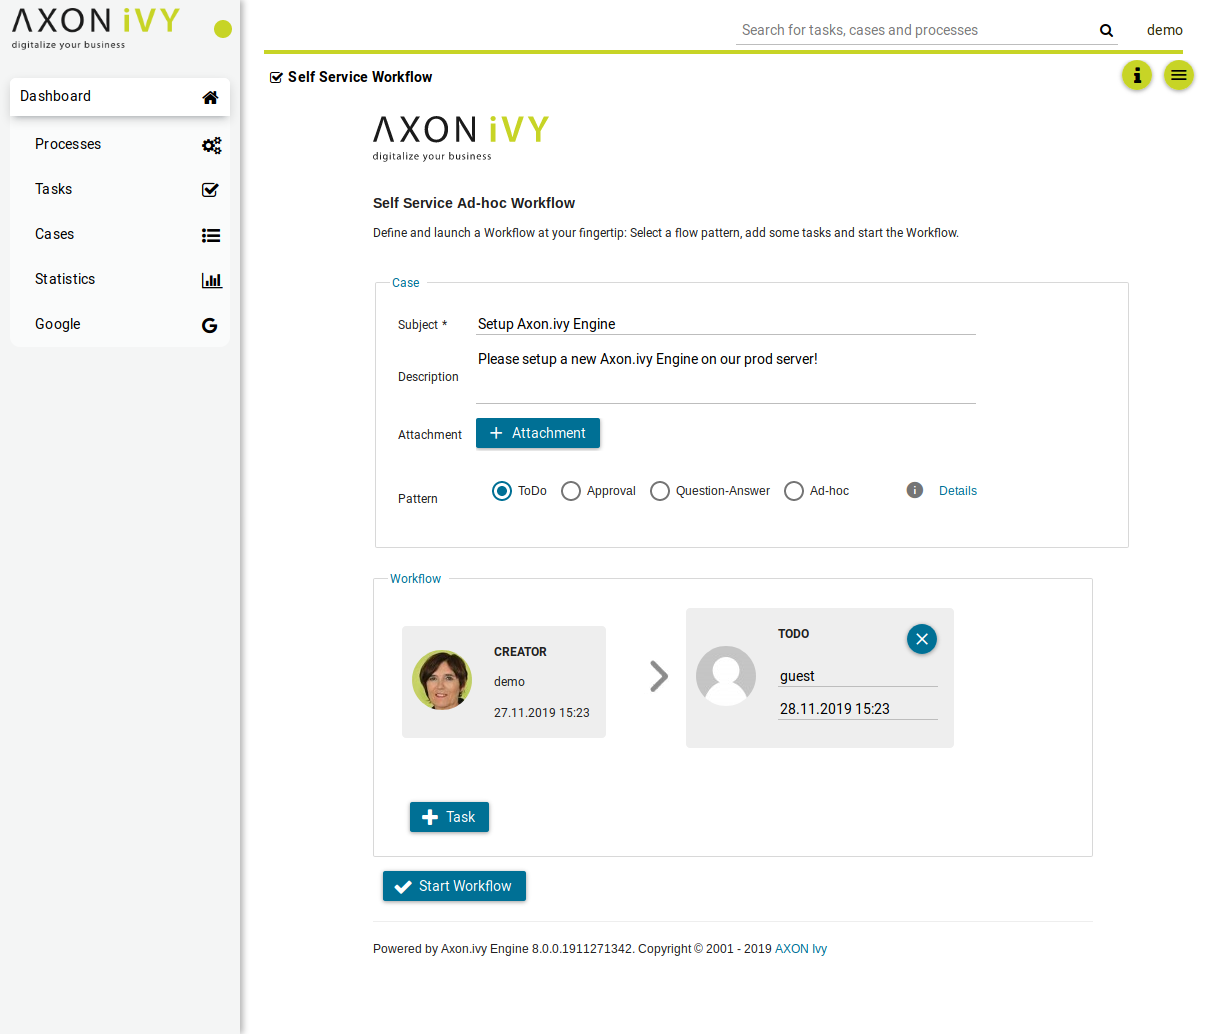
Start the workflow by pressing the Start Workflow button. After that, logout, then login again as guest user. On the task list, you now see the new TODO task that you created before. Try to work on the task by clicking on it:
Go ahead and play around with the Selfservice process. Try out different types of tasks.
Note
In Axon.ivy a task is a piece of work (a part of a process) that is assigned to a user or role. A user to whom a task is assigned or who has the role to which a task is assigned can work on the task. When a user works on a task the task disappears from the task list of other users who might also able to work on the task. This means only one user can really work on a task at the same time. In a process, it is possible to define parallel tasks. Therefore, it is possible that two or more users work parallel on different tasks of the same process instance. In Axon.ivy a process instance is called a case.
Configure the Engine
Now, let’s configure the Axon.ivy Engine with a license and system database.
To start with that you must first request a valid Axon.ivy Engine license. Either you get a license for your productive system through one of our sales personal or contact our support for time limited tryout licenses. If you do not have a license you can skip this section and continue with the next section.
Moreover, you need to have a supported database server up and running with a database user that has the rights to create new databases. The configuration and creation of the system database differs a little bit depending on the database system you use. We will use a PostgreSQL database server.
Shutdown the Axon.ivy Engine first by stopping its service
systemctl stop axonivy-engine-8.service
Let’s install the license. You can do this by simple copy the license
*.lic file into the configuration folder
cp ~/license.lic /etc/axonivy-engine-8
To configure the system database, use the config-db command of the
EngineConfigCli tool. Replace yourdatabasserver with the name of the
host where your PostgreSQL server is running. Replace dbuser and
password with the credentials of a database user that has the rights to
create a new database on the database server.
cd /usr/lib/axonivy-engine-8/bin
./EngineConfigCli config-db org.postgresql.Driver \
jdbc:postgresql://yourdatabaseserver:5432/AxonIvySystemDatabase \
dbuser password
Now, let’s create the system database with the create-db command
./EngineConfigCli create-db
Note
The system database is used by Axon.ivy Engine to store configurations, users, roles, process instances, tasks and process data.
Next, define an administrator by modifying the ivy.yaml file of the
/etc/axonivy-engine-8 directory:
1# sample ivy.yaml which defines a single administrative account:
2Administrators:
3  admin:
4    Password: 1234
5    Email: sudo@acme.com
Note
Administrators can administrate the Axon.ivy Engine. For example, they can add or remove users, assign user to roles, enable or disable applications, etc. Therefore, you need at least one administrator so that you can later administrate the Axon.ivy Engine. The Email address of administrators are used to send mail notifications if license problems occur.
Optionally, disable the AJP protocol connector of the Axon.ivy Engine internal
web server in the ivy.webserver.yaml file of the
/etc/axonivy-engine-8 directory:
1# sample ivy.yaml which disables AJP, as no front-end webserver is in charge:
2Connector:
3  AJP:
4    Enabled: false
Note
The Axon.ivy Engine internal web server provides connectors for the following protocols:
- HTTP
Protocol used by web browser to communicate with a web server. This protocol is not secure since the communication is not encrypted. Axon.ivy Engine uses port 8080 by default.
- HTTPS
Like HTTP but secure. It uses TLS to encrypt the communication between the web browser and server. Axon.ivy Engine uses port 8443 by default.
- AJP
This protocol is used to communicate with a Microsoft IIS or Apache httpd front-end server. AJP means Apache Jakarta Protocol. Axon.ivy Engine uses port 8009 by default.
Have a look at the ivy.webserver.yaml to see what other parts of the webserver and its connectors can be adjusted for your needs.
Now, start the Axon.ivy Engine again
systemctl start axonivy-engine-8.service
Note, that the HTTP port of the Axon.ivy Engine may have changed. If you did change the http settings! So open again a web browser and navigate to http://yourservername:yourportnumber/ivy. Note, that the header with the demo mode message is gone. You now have a production ready Axon.ivy Engine.
Deploy an Axon.ivy project to the Engine
Let’s deploy an Axon.ivy project to the Axon.ivy Engine. We use demos that are shipped with the Axon.ivy Designer.:
cd /var/lib/axonivy-engine-8/deploy
sudo -u ivy wget https://developer.axonivy.com/permalink/lib/dev/demos.zip
Note
Here we deploy a new application by dropping packed (IAR) projects into it. However it is also possible to deploy full applications as ZIP or unpacked projects.
You can monitor the deployment with:
tail -f demos.zip.deploymentLog
As soon as the deployment is finished the zip-file will be postfixed with
.deployed. In case of an error the postfix is .notDeployed. E.g.
demos.zip.deployed.
Note
An Axon.ivy Engine can manage multiple applications. Each application has its own user and task management. A user of one application can only work in that application and not in another application. A task of one application will never be visible in another application. Therefore, applications can be used to build multi tenancy or stages (DEV, Q&A, PROD) without to install multiple Axon.ivy Engines.
Refresh the main page of the Axon.ivy Engine. There is now a new application called IvyDemoApp with a section called WorkflowDemos. Under it links are available to start processes.
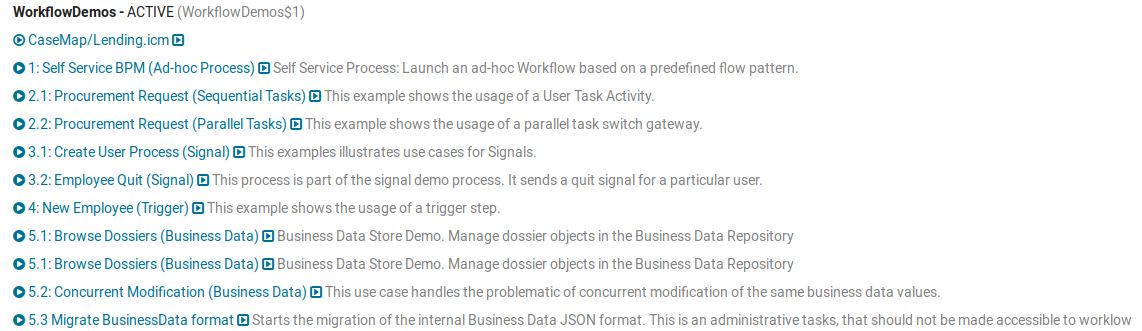
Congratulations you have installed and configured your first Axon.ivy Engine and also deployed your first Axon.ivy processes.