REST Client Activity
 The REST Client Call Activity element is located in the
Activity drawer of the process editor palette.
The REST Client Call Activity element is located in the
Activity drawer of the process editor palette.
Element Details
Use the REST Client Activity to invoke REST services.
Inscription
Name Tab
The Name Tab is included in the mask of all process elements and contains the name and a description of the element.
Request Tab
On this tab you can configure the call to the REST service.
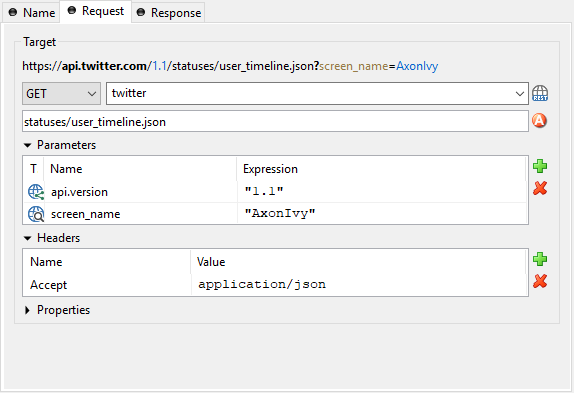
REST Client Request tab
- Target
HTTP-Method: The first combo lets you select the HTTP method to use. You can choose one of the well known methods like GET, POST, PUT or DELETE.
REST-Client: The second combo lets you pick a pre-configured REST Clients.
Path: The text input can be used to define a resource-path. The provided path will be added to the base URI which is defined in the REST Clients. Use the attribute browser on the right side to insert dynamic parts to the URI.
Parameters: Use this table to define query parameters that should be added to the URI. Or switch the type to ‘template’ in order to resolve a dynamic path template with a concrete value.
The parameter value is scriptable and can therefore contain process variables or other dynamic content.

Headers: Will be sent with the request and can be interpreted by the target service. For instance, many REST APIs can provide data in multiple serialization formats. By setting the
Acceptheader, the preferred format can be propagated to the target service.Any other HTTP-Header can also be configured. However, the
Authorizationheader is easier to configure with an authorization feature on the REST Clients.
Properties: Are used to configure optional features or native properties of the REST client. They are globally configurable in the REST Clients properties. Here you can overwrite a property with dynamic values.

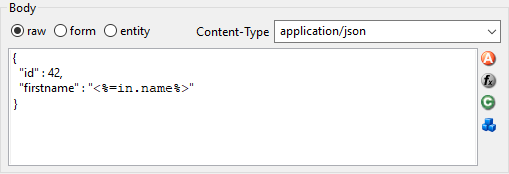
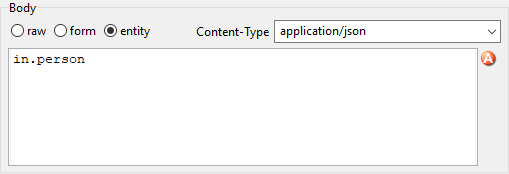
- Body
For POST and PUT requests the body section can be used to specify that data that will be sent to the REST service.
Raw: Define the Content-Type first and define any textual content in the editor part. The content can contain dynamic parts like process data fields. Use the action buttons left to the editor in order to insert a dynamic variable or function call.
Form: Send form values as content of type
application/x-www-form-urlencodedThe form values are scriptable.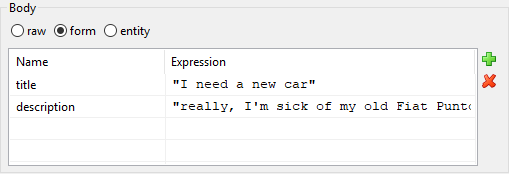
Entity: Send a complex object as serialized text to the remote REST service. Most Java objects should be serializable as JSON (application/json) without additional configuration.
The serialization behaviour can be configured for special needs via properties on the client.
Response Tab
On this tab you can consume response from the REST service.

REST Client Response tab
- Body
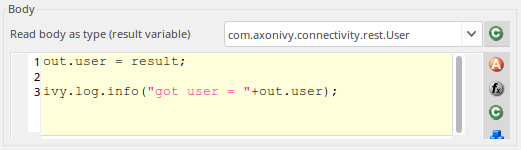
Result-Type: The first combo defines how the response entity will be read. Pick a Java type that can be mapped to response entity. The entity object is available in the ‘result’ variable.
See the chapter below (JSON to Java) for a quick comparison of response body mapping solutions.
The deserialization from JSON to a Java object can be customized with properties on the client.
Code: Use the code editor to handle the response or its entity. In most cases, you only need to assign the ‘result’ variable to your process data. However, in this editor the JAX-RS ‘response’ variable is also available which lets you access the HTTP-status-code and other details of the HTTP response.
- Error handling
On Error: Choose the Error Code to throw if the REST client fails with an exception. This is typically the case if a connection or timeout problem exists. Pick ‘>> Ignore Error’ to continue the process execution even though the REST service call failed with an exception.
On Status Code not successful: Fail automatically with an Error Code if the HTTP response status code is not in the 200 family. Pick ‘>> Ignore Error’ if other status codes are valid and expected.
JSON to Java
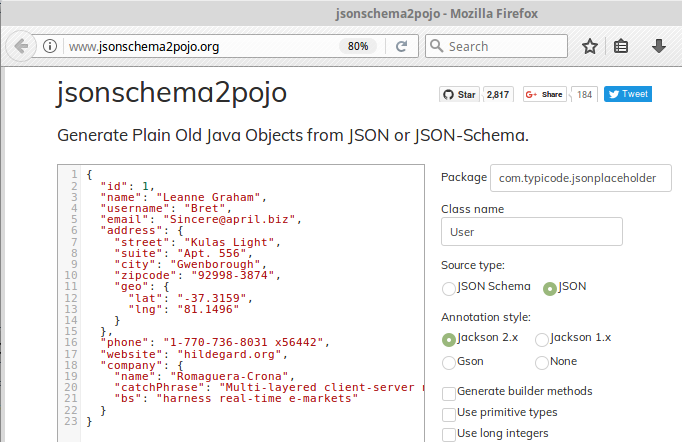
The mapping of a JSON response body to a Java object is a simple task. Think of a service that returns a complex JSON. E.g:
{
  "id": 1,
  "name": "Leanne Graham",
  "username": "Bret",
  "email": "Sincere@april.biz",
  "address": {
    "street": "Kulas Light",
    "suite": "Apt. 556",
    "city": "Gwenborough",
    "zipcode": "92998-3874",
    "geo": {
      "lat": "-37.3159",
      "lng": "81.1496"
    }
  },
  "phone": "1-770-736-8031 x56442",
  "website": "hildegard.org",
  "company": {
    "name": "Romaguera-Crona",
    "catchPhrase": "Multi-layered client-server neural-net",
    "bs": "harness real-time e-markets"
  }
}
You can handle this complex JSON object with one of these solutions:
Map to Data Class: Create a Data Class with the attributes you need in the business process. Read the result body with this Data Class. Every attribute that matches by name (case sensitive) with an attribute in the JSON object will be mapped. Assign the
resultobject to an attribute of your process data. This option should be used if you want to reflect a small JSON structure.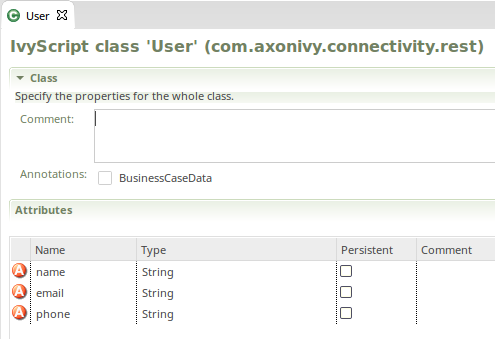
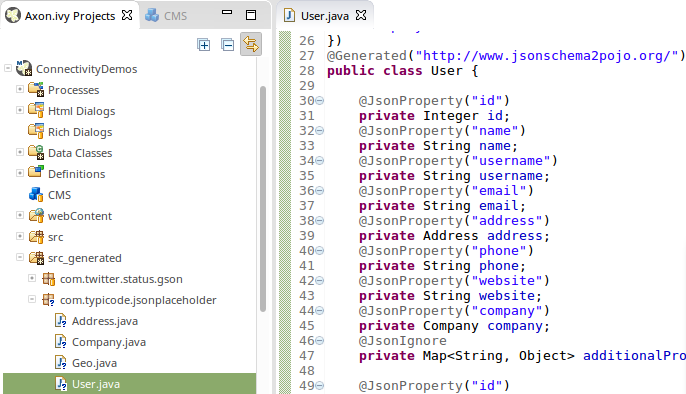
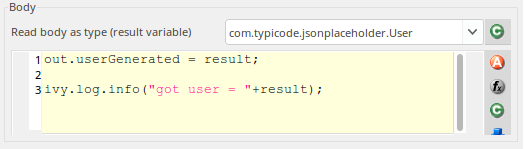
Map to Generated Class: Paste the JSON you receive from the service into a Java object source generator like http://www.jsonschema2pojo.org/. Generate the Java sources for the JSON structure. Download the sources and add them to a special source folder (E.g.
src_generated). Now you can read the response body to an object of this generated class.This option should be used if you want to represent a complex JSON structure without writing code yourself.
Map to JSON Node: Read the result body as
JsonNodeobject. Navigate through the object tree and read its field values manually. This option should be used if you don’t want to reflect the whole object structure and only need parts from the object tree.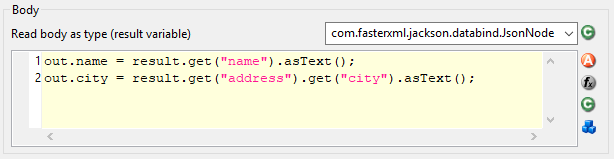
Customization
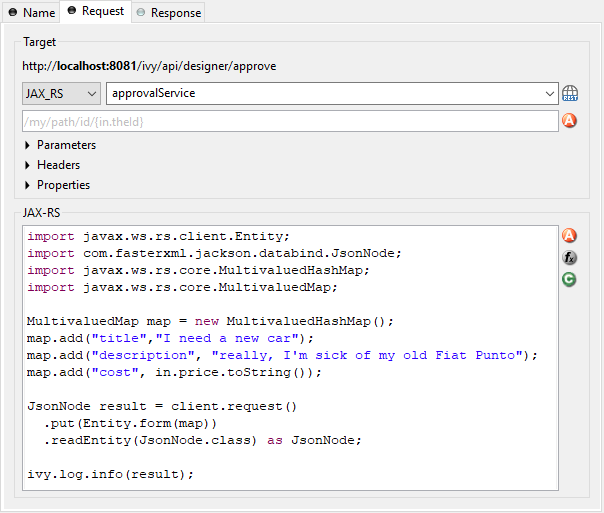
The inscription mask provides a handy UI that makes most calls to a REST service very simple. However, there are always corner cases where you need to configure something, which is not configurable on the UI. In these rare cases, you can use the fluent JAX-RS API to call the service and interpret the response. To do so you can choose ‘JAX_RS’ as HTTP Method. In the scripting field that became visible you can configure every detail of the REST request done by this element.
In the scripting field, the variable client holds the REST client
chosen in the Target section. The whole setup from the Target section
will be applied to this client variable.
Call from Java
Rest Client calls can also be executed via Public API without using the Rest Client Activity.
The entry point to access Rest Clients is Ivy.rest(). The returned
object is an instance of a
javax.ws.rs.client.WebTarget
which is pre-configured as defined in the REST Clients. It
provides fluent API to call the remote REST service.
Sample
// retrieve pre-configured rest service client
WebTarget client = Ivy.rest().client("myServiceName"):

// GET request to receive a simple string
String token = Ivy.rest().client(UUID.fromString("e00c9735-7733-4da8-85c8-6413c6fb2cd3")).request().get(String.class);

// POST request to send a complex object
Ivy.rest().client("crmService").request().post(javax.ws.rs.client.Entity.json(myPerson));
Re-use configuration
If you notice that you configure precisely the same thing on multiple Rest Client Activities you can reduce this duplication.
Instead of applying the configuration multiple times, it can be set
globally on the REST Clients. Almost any aspect of a Rest
Client call can be configured by implementing a custom feature
(javax.ws.rs.core.Feature). Our authorization feature can be taken
as an example:
ch.ivyteam.ivy.rest.client.authentication.HttpBasicAuthenticationFeature.